Friday, 17 November 2017

How to Create a Light Effect on Text

In my recent first draft of my film poster, I added a light effect onto the title's text, that makes the font seem as if it is emitting blue light. I thought this was a really cool trick that I learnt in a YouTube video and I thought it would be beneficial to show how I created that effect.


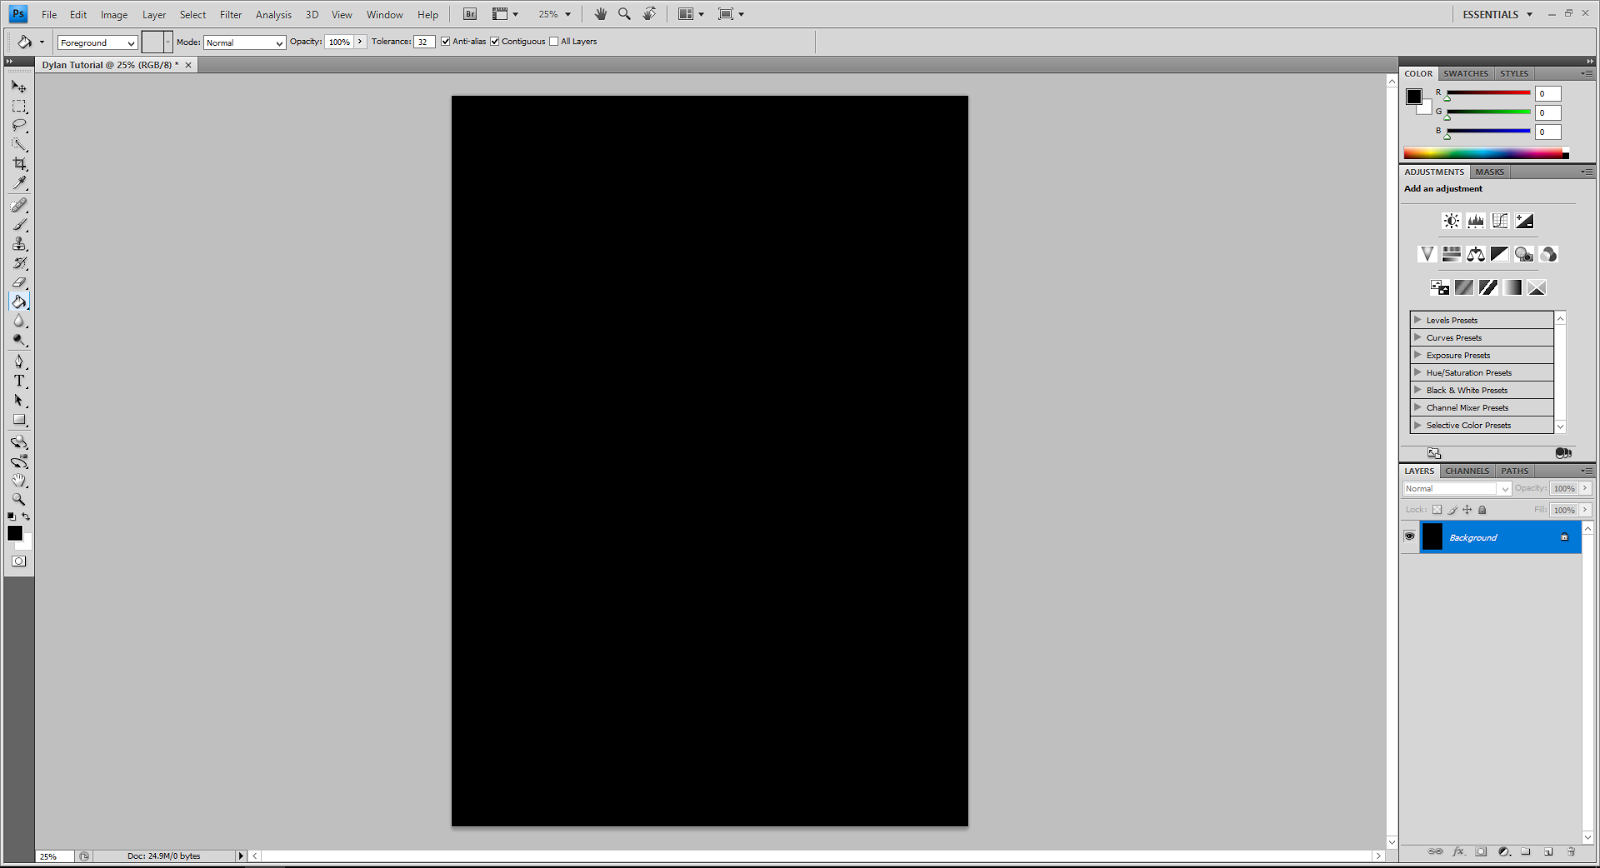
1. Open up a new Photoshop page with an A4 canvas (if creating a poster).
2. Fill the background in black
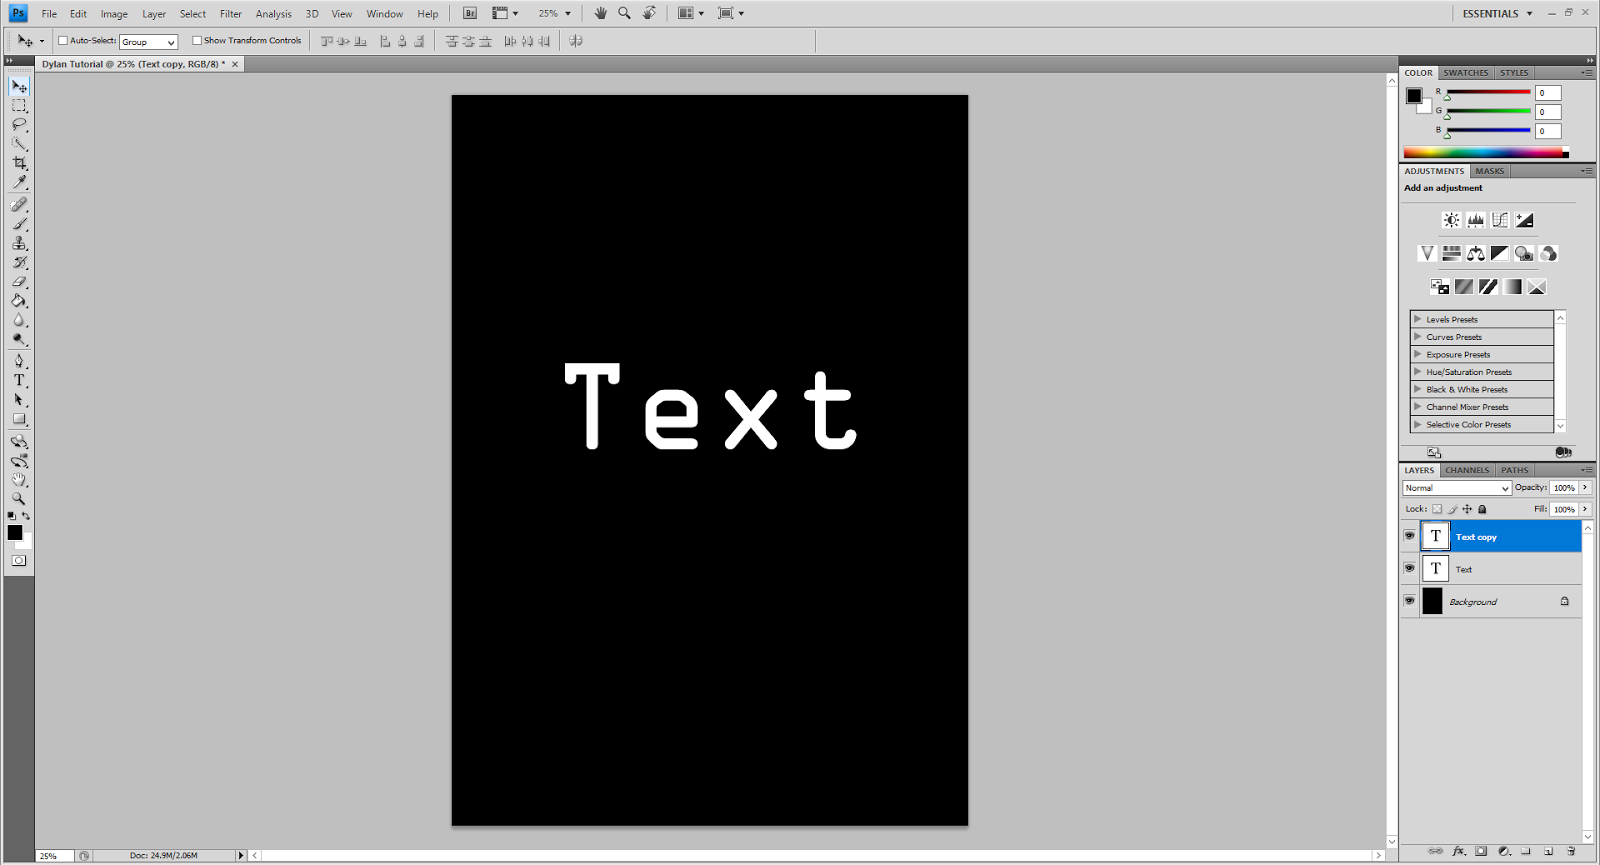


3. Create some text by pressing 'T' on the keyboard (shortcut to the text tool) then type the title in a white font.
4. Duplicate the layer by pressing 'Ctrl' + 'J' (CMD + J).


5. On this duplicated layer add a 'Radial Blur' of about 20 with the settings 'zoom' and 'best' selected. To add a 'Radial Blur' click 'Filter' (at the top of the page) > 'Blur' > 'Radial Blur'.
6. After adding the blur once, press 'Ctrl' + 'Alt' + 'F' (CMD + Ctrl + F) to reapply the blur, repeat this numerous times until happy with the glow of the text.


7. Add another blur, found in the same place as 'Radial Blur' called 'Gaussian Blur'. Add a radius of around 0.6.
8. Now add this same blur to the first layer of text that hasn't been rasterized yet.


9. Create a new layer on top of both text layers and fill it in black.
10. Select this layer and add a 'Lense Flare'. To do this select 'Filter' > 'Render' > 'Lense Flare' and select the 105mm. The brightness is up to you! Make sure that you position the flare at the same place where the text positioned.
11. Select the layer again, and change the blending option to 'Screen'. The blending option is found just above where you select the layer.
12. Create another new layer on top of both the text layers and lense flare, then colour it with the intended colour of the light. In the case of my poster it is blue, in this tutorial I am using red.
13. Select the blending option for this layer to be 'Overlay' then change the opacity (found in the same area as where you select the layer) until you are happy with the colour.


Clear up the smaller light bits with a black paint tool if you wish, or just cover them with images!


Inspirations & Ideas for Ancillary Tasks: Poster

After researching the most important parts to an effective film poster on

https://www.webdesignerdepot.com/2011/02/7-elements-of-a-great-movie-poster-design/

And identifying the different aspects that make up a poster, such as a title, main image etc. I have looked at specific film posters that I wish to draw inspiration from and have made my very first, rough draft of what my poster may look like.

This prezi also contains the first draft for my poster.

Wednesday, 15 November 2017

Initial Ideas for my Ancillary Tasks: Poster

POSTER

With the name in progress of my short film being 'blue light'  I have thought of a rough idea of how I'm going to make the poster.
I've noticed that some films released have more than poster to advertise with, a good example of this is the 'Hangover' trilogy.


I want to make three posters for the film, one being with a laptop, one with a TV, and another with a phone.
With all three I hope to have a glowing text, and incorporate the screen into my design by having reviews etc on the screens.
I'll need to take a photo of a laptop, iPhone and a TV for my images. These images with be the main and only image for my posters.

Tuesday, 14 November 2017

Working Title - blue light


This name refers to the blue light that is emitted from screens and even provides the light for our short film. It is believed to have harmful effects on humans, most notably that it disorientates the body's clock as being on your phone before sleeping stimulates sunlight and confuses the body.
We have chosen to use lower case to reinforce the divide between humans, who have capital letters at the start of their names, and technology which isn't a pronoun.


Monday, 13 November 2017

Ancillary Tasks

For my ancillary tasks this year I have decided that I will create a movie poster, as well as a radio trailer for the film. Here are a few examples:


Radio Trailer


Film Poster

Wednesday, 8 November 2017

Editing the First Draft


The past week I have been editing the first minute of our footage. I will discuss more about my editing techiques and reasons for certain elements when I finish and upload the footage this Friday. Overall, it is turning out great for a first draft, we experimented with a purposefully shakey/handheld camera, however we may refilm with a still, stabilisized camera instead to see if it's more effective. Overall, we have gone for a blue hue lighting to reflect the blue light that is emitted from screens such as TVs and Laptops which fits in with the whole technology theme surrounding our piece. I have added the blue lighting in post-production using the colour correction technqiues I learnt from Rob Johnstone's visit.


Monday, 6 November 2017

Casting, Representation and Costumes

We have chosen our actors for each role for specific reasons, as we feel they fit in with the ideal characters and ideas that we want to portray.

Liam as 'Laptop Guy'


We feel Liam suits this role as his long hair, styled the way is is suits the stereotype of a typical gamer. He will wear a beanie, checkered shirt and glasses while we film to again reinforce this kind of stereotype. It will represent gamers in quite a neutral way, as we could use a overweight character who is greasy and doesn't care for themself, but instead we have gone for quite an indie look as we already have a greasy character and don't want to represent gamers in a negative way. We have chosen to represent gamers in a neutral way as it isn't what we want the audience to pay particular attention to, we are more focused on his teenage demographic and have only included a gamer so the gamers in the audience can relate the character, allowing the short film to deliver a more powerful message.

Felix as 'TV Guy'


Felix suits our idea for the TV Guy due to his great acting. We wanted our main character to be an effective actor as body language for this role is vital as we wanted to connote and portray a lazy character. Through his character we are mainly representing older, male teens in a negative way. We are suggesting that they are lazy and just sit in the dark all day, looking at screen. The representation of teenagers is vital to our piece.
Felix's character is wearing his costume in the photo above, minus the beanie. By wearing a bland, unbranded tracksuit, it connotes him to be lazy and sluggish as we present his character and age range to be lazy, which reflects onto the technology he is using as his negative characteristics are at fault of the technology.

Chloe as 'Phone Girl'

My sister suits this role as she looks like a stereotypical blonde girl. She has a small frame, blonde hair and is also very adept at acting. Through her we are representing older, female teens. They are recieving a stereotypically negative representation, with them being obsessed with their image and glued to their phones.
Unfortunatley, I haven't gained permission from my sister to use her image on my blog, however she is ok to be in our film. Her character will be wearing a white, sleeveless shirt and ripped jeans. Her phone will be a white iPhone as that is the most common phone owned by young people. The costume is not intended to have any deeper meaning, it will be used to reinforce her representation as a stereotypical teenage girl.

None of our characters are from older generations as our primay audience is teenagers. By using characters of a similar age, it means the films message will be more relatable and easier to understand for that demographic.


Wednesday, 18 October 2017

Equipment List

Tripod
Sound Recording
This tripod will be used to keep our shots steady, which is vital for having a level 4 piece. We will borrow a tripod from school to film our idea. The pros of using this equipement is that it is cheap and accessbile, however, they are not 100% still, especially in windy weather, and can limit the number of shots avaliable to use as they only function for certain shots, and are hard to use in high angle shots or tracking shots.

Dylan will use this sound recorder to record audio through his microphone. Again, this is something we will borrow from school as they are quite expensive. Fortunatley, they are easy to use and portable, however, there can be complications when trying to transfer the audio into an Apple MAC.


Camera

Microphone
This is the microphone that Dylan will use to record sound, on set we will have to microphones. Ruben's own one, and one from school, so that we can pick the audio recording with the highest quality. The downside to these is that they don't always pick up the correct sound effectively and can be hard to use.

For our camera, we will use Ruben's Cannon 70D. It is a very good camera, capable of filming in high quality. We will also borrow a camera from the school and set up each scene with two different shots so we can have a wide range of camera shots and angles that we can choose from when editing.


MAC

I will use a MAC to edit our clips on premiere pro. Unfortunatley, the school macs can 
be very slow and faulty, especially when rendering, and so I may edit parts of our
film on my home laptop that has premiere pro, but isn't as powerful as the school
macs and so can't render as much and so overall is a slower process.